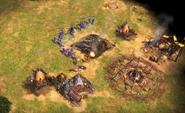
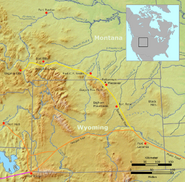
The Bozeman Trail is the first scenario of Act II: Shadow in Age of Empires III: The WarChiefs. It introduces Chayton Black, Amelia Black's half-Lakota son who travels westward to expand the Falcon Railroad Company along the Bozeman Trail. The scenario also introduces Sheriff Billy Holme, who is shown to be a close friend and aide to Black.
Summary[]
The scenario starts out with the cinematic "Chayton" which shows Chayton Black's arrival at Fort Laramie, where he meets the civil war veteran Sheriff Billy Holme. Holme warmly welcomes Black and warns him about the danger of Sioux attacks in the area. Holme then questions Black's lineage, asking if he is Native American. Black answers saying his great-grandmother was an Iroquois and his father was a Sioux that died when he was young. Holmes sympathetically apologizes, and the two head out into the Bozeman Trail.
In the Definitive Edition, Chayton and Holme are instead old war comrades, having fought for the Union army during the American Civil War. Holme is well aware of Chayton's ancestry, referring to him as an "Indian" several times as they catch up.
Starting conditions[]
- Starting Age:
 Exploration Age
 - Ending Age:
 Imperial Age
 - Population limit: 200
- Starting resources: None
- Starting units:
Players[]
Player[]
- Falcon Trading Company (
 Black Family Estate) - The player is provided with a small army of Chayton, Sheriff Holme, and 8 Skirmishers.
Allies[]
- Fort Laramie (
 United States) - Will supply the player with Covered Wagons, Musketeers, Skirmishers, and Dragoons throughout the scenario.
Enemies[]
Player[]
- Falcon Trading Company (Black Family Estate) - The player is provided with a small army of Chayton, Sheriff Holme, and 8 Skirmishers.
Allies[]
- Fort Laramie - Will supply the player with Covered Wagons, Musketeers, Skirmishers, and Dragoons throughout the scenario.
Enemies[]
- Red Cloud (Sioux) - Forces are led by Red Cloud, consist mainly of cavalry units including Bow Riders, Axe Riders, and Dog Soldiers. Infantry consist of War Clubs.
- Crazy Horse (Sioux) - Forces are lead by Crazy Horse, consist a mix of War Clubs, Axe Riders, and Wakina Rifles.
Objectives[]
Primary[]
- Find a Trading Post site
- Build a Trading Post
- Escort the Covered Wagon from Fort Laramie to the Trading Post (twice)
- Destroy both hostile camps
Secondary[]
- Own two Trading Posts when the scenario ends (500 XP)
Primary[]
- Find a Trading Post site
- Build a Trading Post
- Escort the Covered Wagon from Fort Laramie to the Trading Post (twice)
- Destroy both Sioux Town Centers
Secondary[]
- Own two Trading Posts when the scenario ends (500 XP)
Strategy[]
- Note: The Trade Route in this map will be referred to as the trail
This scenario is moderately difficult, as the main goal is to successfully secure the trail and fend off the relentless attacks by the enemy Sioux. From the beginning and throughout the rest of the scenario, the player will face countless raids from the forces of Red Cloud and Crazy Horse.
The player starts out in the southeastern corner of the map just outside the walls of Fort Laramie, with a central trade route starting from the Fort and snaking throughout the course of the map. The player is provided with a small army of Chayton, Sheriff Holme, and 8 Skirmishers. The first primary objective of finding a Trading Post site is also revealed.
Immediately, the player should use the trail to their advantage and follow along it to the north. Along nearby the path will lay some buttes and treasures. As the player is exploring north along the path, a small band of 6 enemy War Clubs will come into view and will quickly attack the player. They won't be a major threat, and the player can use their Skirmishers' anti-infantry attack to quickly defeat them.
Once the War Clubs have been defeated, the player can advance further north along the trail. More treasures will lay near the trail and the player can claim the nearby treasures (guarded by Coyotes and Cougars) at their leisure. At this point, as the player keeps heading further north along the route, the Trading Post site will come into view. However, simultaneously an enemy band of 4 Wakina Rifles will charge in from the north. 4 of Crazy Horse's Axe Riders will also arrive during combat to aid the Wakina Rifles. This is where Chayton's crackshot ability will be useful. A casualty or two may unfold during this battle.
Once the Axe Riders have been defeated, the player can proceed to build the Trading Post on the site. As soon as the Trading Post is built, a Covered Wagon and 6 Musketeers will arrive from the south in Fort Laramie, heading north along the trail. The primary objective of escorting the wagon safely along the trail will also be revealed. The player can begin to divert their main force south to meet with the wagon and Musketeers, as safety better is in numbers.
- Note: The Covered Wagon will play an extremely important part of building a Town Center and settlement in the scenario. If it is destroyed, the player will lose the scenario.
It is important that the wagon and Musketeers don't move north along the trail to join the player's main force as they are bound to be attacked from enemy natives, so it is advised to keep them stationed near Fort Laramie. While the player's main force is moving down south, there will be an attack by 4 enemy Bow Riders. Once again, using Chayton's crack-shot ability will help take out 2 of the Bow Riders, while Holmes and the Skirmishers will help finish off the rest.
Once the 2 forces meet, the player can then head back up north to the Trading Post site where the Town Center should be built just left of Trading Post. At this point, the next primary objective of building a second Trading Post will be revealed. While the Town Center is being built, the player should stay put and not head out further north, as this will leave the growing Town Center to ultimate destruction by enemy native forces. Groups of enemy natives may move in from the west; however, they should be ignored unless they attack, as the goal at the moment is to safeguard the Town Center.
Once the Town Center is built, the Villagers should be tasked hunting the nearby Bison for food. The player can now also head further north along the trail where they will soon spot the second Trading Post site. The Trading Post site will be near a herd of bison, and a band of 4 enemy Axe Riders pour in from the west. The player should put the Musketeers in melee mode to help take out Axe Riders, as they have a bonus against Cavalry. Once the riders have been defeated, the player can build their second Trading Post on the site.
After the second Trading Post is built, a second Covered Wagon and 4 Dragoons will be provided to the player. The player can place the new Town Center site either between the 2 Trading Posts or right next by Fort Laramie. Either way, both Trading Posts will need to be protected and in possession to complete the scenario. While the second Town Center is being the built, the player's main settlement will need to build 4-5 Longhouses to accommodate a large army.
Around this point is the turning point of the scenario, as the player can now begin to produce a powerful enough economy from their settlement to foster enough troops to destroy both enemy Sioux Town Centers. Renegados can be trained from Sheriff Holme; however, they are costly and take up too much population. The player can send all their Musketeers to guard the northern Trading Post, while the rest should guard the main settlement in the center. The Home City shipments should be garnered towards getting military troops such as Tomahawks, Revolutionaries, and Kanya Horsemen. While the main settlement is growing and producing troops, waves of attacks by Red Cloud's forces will ensue from the east. Once there is at least 8-9 Tomahawks, 12 Skirmishers, 4 Dragoons, and 6-7 Musketeers, the player can head out west to destroy Crazy Horse's Town Center.
As the player arrives to Crazy Horse's settlement, a group of 7-8 Axe Riders will promptly attack the player, and the Musketeers and Chayton's crack-shot ability will help take them out. A bloodbath and some casualties will ensure, but once the riders are defeated the player can head straight to destroy the orange Sioux Town Center. As soon as the Town Center is destroyed, the forces should head back east straight to the main settlement to regroup for a final push towards Red Cloud.
The player will now need to train more troops and build additional Houses to accommodate the population. Red Cloud's forces will be significantly more numerous, so the player will need to create an even larger army. Once the player creates at least 20 Musketeers and 10 Skirmishers along with the remaining Dragoons, the player can station them just east of the settlement on guard. Once Chayton and Holme are in full health, the player can send their powerful force east towards Red Cloud's settlement.
Immediately upon arrival of the settlement, an enemy of 10-11 Axe Riders and 2-3 Bow Riders will be guarding the settlement's Fire Pit. The player will need to use the hit and run strategy with the Musketeers and Skirmishers to help fight off the enemy units. Chayton's crackshot ability will also help take out 1-2 of the cavalry. However soon the enemy forces will close in and a final large bloodbath will ensue, multiple causalities will occur to the player's troops.
After Red Cloud's cavalry have been defeated, the player will need to use their remaining troops to quickly finish off and destroy the Town Center before more enemy troops arrive. The razing process will be tedious, and the Muskeeters stationed in the northern Trading Post may be needed to help quickly raze the Town Center. Enemy Warriors summoned from the Fire Pit will frantically attempt to fight off the player's troops and although will pose minuscule damage to the player's forces. Once Red Cloud's Town Center is destroyed, the Bozeman Trail is secure and the player has won the scenario.


