| Line 97: | Line 97: | ||
== Historical outcome == |
== Historical outcome == |
||
| ⚫ | |||
| ⚫ | |||
| ⚫ | {{quote|Hammurabi ruled Babylon for 42 years and presided over the first great Babylonian Empire. He captured both Akkad and Sumer, reestablishing the eastern part of Sargon's old empire. He extended his influence into and over the Zagros Mountains, subjugating both the Gutian tribesmen of the hills and the Elamites on the plateau beyond. He is best remembered for his code of laws and penalties that standardized justice throughout his empire. A contemporary copy of the code survives today, carved in stone.|In-game section}} |
||
| − | |||
| ⚫ | |||
{{quote|You managed to capture both Akkad and Sumer, reestablishing a great part of Sargon's old empire. With Babylonian rule extended to the other city states, you can bring Hammurabi's law code to them and ensure further peace and stability in the empire. However, there is n time to revel in your success. The people in the Zagros mountains are restless and threaten the peace, Hammurabi has called upon your services once again to deal with them.}} |
{{quote|You managed to capture both Akkad and Sumer, reestablishing a great part of Sargon's old empire. With Babylonian rule extended to the other city states, you can bring Hammurabi's law code to them and ensure further peace and stability in the empire. However, there is n time to revel in your success. The people in the Zagros mountains are restless and threaten the peace, Hammurabi has called upon your services once again to deal with them.}} |
||
| + | |||
| ⚫ | |||
| ⚫ | {{quote|Hammurabi ruled Babylon for 42 years and presided over the first great Babylonian Empire. He captured both Akkad and Sumer, reestablishing the eastern part of Sargon's old empire. He extended his influence into and over the Zagros Mountains, subjugating both the Gutian tribesmen of the hills and the Elamites on the plateau beyond. He is best remembered for his code of laws and penalties that standardized justice throughout his empire. A contemporary copy of the code survives today, carved in stone.|In-game section}} |
||
| + | </tabber> |
||
== Changes == |
== Changes == |
||
Revision as of 15:00, 11 March 2018
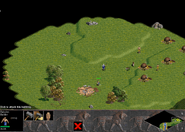
Holy Man is the first campaign scenario featured in the Voices of Babylon in Age of Empires. This scenario features the Hammurabi reign, that expanded the city-state hegemony across a large portion of Mesopotamia against his neighbors.
Scenario Instructions
Starting Conditions
- Starting Age:
 Stone Age
 - Starting resources: 200 wood
- Population limit: 50
- Starting units:
- 1
 Priest
- 1
- Gaia units: None
Description
| “ | Mesopotamia, 1760 BCE The small city state of Babylon is growing under the energetic leadership of its new king, Hammurabi. You have been sent down river to bring some enclaves of Sumerians and Akkadians into the fold. Use your powers of persuasion when you can, but don't hesitate to resort to war if they prove to be resistant. | ” |
Objective
- Convert or destroy the Sumerians
- Convert or destroy the Akkadians.
Starting Conditions
- Starting Age:
 Stone Age
 - Starting resources: 200 wood
- Population limit: 50
- Starting units:
- 1
 Priest
- 1
- Gaia units: None
Description
| “ | The small kingdom of Babylon is growing under the energetic leadership of its new king, Hammurabi. You have been sent down river to bring some enclaves of Elamites and Akkadians into the fold. Use your powers of persuasion where you can, but don't hesitate to resort to war if they prove difficult. | ” |
Objective
- Convert or destroy the Elamites and Akkadians.
Players
Player
- Player (Babylonians): The player starts with only a Priest against the two opposing civilizations. Starts at the south corner of the map.
Enemies
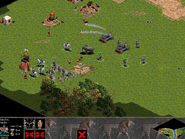
- Sumerians (Sumerians): The sumerians start with the most advanced town, including some clubmen and axemen. They are located at the west of the river
Neutral
- Akkadians (Babylonians): The Akkadians are located to the east of the river, and start without militar units, with a Town Center, some villagers and houses. They are located at the east side of the river.
Strategy
- NOTE: This walkthrough was written for gamers playing on Normal difficulty with a population limit of 50 for the original Age of Empires. This is simply a rough guide on how to finish the scenario. Due to the vast variability of the game, not everything written here will apply to another situation.
Tips
- Players will have to attack two tribes at once, or else one tribe will grow too strong. Players should not neglect attacking the Sumerians.
- Convert regularly.
- Keep all priests as safe as possible - they are expensive to replace.
- During the stone age, convert Villagers rather than building them. Advance to Tool Age as quick as possible.
- Once the player has advanced to the Tool Age, distribute the villagers' roles equally.
- If possible, use two priests to convert an aggressive unit.
- If players are experiencing difficulty, they are advised read the whole guide first, rather than focusing on one part.
- Not everything here will apply to another situation.
- It is imperative that players do not allow Yellow Tribe to build a Watch Tower, or build too much Clubman units.
- Save regularly.
Walkthrough
Players begin with a slow priest and 200 Wood, with two enemies,to the north the Sumerians and to the west the Akkadians. Note that it is imperative that the lone priest should avoid the red camp whilst in the Stone Age - they start with several clubmen and axemen, and if players attempt to convert any of them, the red units will catch up to the slow walking priest, and kill it. Walk in a north easterly direction, following the river, until the priest meets a swamp that allows it to cross to the other side of the river.
Keep walking east until the priest arrives at yellow camp. So far, Akkadians should consist of several houses, villagers, a storage pit, and a town center. Convert a villager, preferably one mining stone. This should take roughly 10 seconds, if it takes any longer, try another villager. Get the villager to build a town center anywhere near the vicinity of Yellow town. Now, save. The reason players should convert a villager mining stone, is because the yellow tribe can advance to the Tool Age, and build a tower, at any time. It is absolutely imperative that Yellow Tribe not be able to build a tower. If, by any chance, Yellow Tribe build a tower:
- If they are in the process of building it, swarm the construction with attacking units whilst converting the villager building it.
- If the tower has been built players can either relocate their town and units, or get every single unit, with the exception of the priest, to attack the tower.
By now, players should have a town center, a villager, a priest, and no supply of any materials. Get the converted villager to chop trees, whilst keeping an eye on the priests rejuvenation level. As soon as it reaches 100%, convert another villager. Get several villagers to cut trees, forage berry bushes. When the players have the right amount of wood, make a granary and barracks. Make approximately 5 or 6 clubmen, and attack the yellow barracks, to eliminate the threat. If a clubman is made, kill it. Keep the priest nearby to heal - it is crucial that units do not die, however remember to keep converting villagers. After destroying the yellow barracks, save.
If possible, build houses relative to population level. However, the main goal whilst in the Stone Age is to advance to the Tool Age as quick as possible.
Once all Akkadians villagers are converted, the town is as good as dead, as the AI Akkad units just stand around doing nothing.
There is the threat of a pair of red clubmen or Axemen wandering around every now and then. Use all the clubmen, and swarm them, to lessen the chance of any unit dying. The new objective in the Tool Age is to accumulate as much food, and gold as possible (whilst still obtaining wood and stone of course - sensible distribution of roles is crucial), and build Watch Towers on the outskirts of the player's own camps. Place the Watch Towers strategically, there's no use in having them bunched up, when the red camp can attack from anywhere.
This will be a long scenario - but it is possible to be in the Iron Age and to have Sumerians (Red) on Tool Age and Akkad (Yellow) all dead and unit-less on Stone Age at the same time.
The two buildings of choice for the Tool Age are the Market, and the Stable. The Market is important because it is required to build a Farm. Building a Stable is also important since it is the only structure that produces Scouts and Cavalry (Cavalry in Bronze Age). Both of these units are quite strong, high in hitpoints and quite fast, so they can evade danger if necessary.
The gold is required for priests and bonuses, and to enter Iron Age from the Bronze Age, and it is better to start stockpiling early. Note that it is not necessary to reach the Iron Age in order to defeat the Elam. Upgrade the stat properties of the Scout and Axemen through the Storage Pit, and once the player has 800 food, advance to the Bronze Age. If one runs out of gold to mine from, there is gold located in the original starting point of the campaign, and also near the southernmost point of the map, on the Akkadian side of the river.
When Bronze Age is reached, it is time to attack - build a temple and a siege workshop, which will produce priests and stone throwers. Again, upgrade the stat properties, and make a few cavalry, stone throwers, one Priest (two if the original priest died) and one or two Hoplites. This will suffice for the scenario. Walk to the riverbank, with all infantry and cavalry units, and there will be an Sumerian Dock, accompanied with one or two Scout Ships. Players might want to bring a villager also, in order for it to build a tower on the Akkadian side of the riverbank, close to the river, to take care of any Sumerian units that wander around. The Sumerians should be in the Tool Age.
Use two Priests to convert the Scout Ship. If there are two Scout Ships, use the two Priests to convert one, and that Scout Ship will attack the other, leaving the player free to pass. Quickly bring all units over, and use all units to attack the Dock.
Move all units up - there will be several Watch Towers. Advance the Stone Throwers up - they will take care of the Towers. Keep all other units back, in front of the Stone Throwers. Unfortunately, attacking the towers provokes other units, and various Clubmen, Axemen and Bowmen will try to attack the Stone Throwers. The players statistically-improved Axemen and Hoplite will overwhelm the Sumerian Axemen and Clubmen dramatically, and the Cavalry, with high hitpoints, can take care of the Bowmen. Once all Watch Towers are destroyed, it is safe to move into town.
The buildings to destroy first are the Archery Range and Barracks. Use both Stone Throwers on the Archery Range, and all other units on the Barracks. Afterwards, destroy the Town Center, so that villagers can not be produced, then the rest of the town at the players choice.
Historical outcome
| “ | You managed to capture both Akkad and Sumer, reestablishing a great part of Sargon's old empire. With Babylonian rule extended to the other city states, you can bring Hammurabi's law code to them and ensure further peace and stability in the empire. However, there is n time to revel in your success. The people in the Zagros mountains are restless and threaten the peace, Hammurabi has called upon your services once again to deal with them. | ” |
| “ | Hammurabi ruled Babylon for 42 years and presided over the first great Babylonian Empire. He captured both Akkad and Sumer, reestablishing the eastern part of Sargon's old empire. He extended his influence into and over the Zagros Mountains, subjugating both the Gutian tribesmen of the hills and the Elamites on the plateau beyond. He is best remembered for his code of laws and penalties that standardized justice throughout his empire. A contemporary copy of the code survives today, carved in stone. | ” |
| —In-game section | ||
Changes
In the Defintive Edition, the enemy player Elam was changed to Sumerians, replacing also their Egyptian tech-tree for the civilization of the same name.


