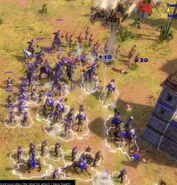
Company Confrontation is the fifth and final scenario of Act III: India in Age of Empires III: The Asian Dynasties.
Summary[]
The scenario is quite difficult with very stiff resistance by the Company troops. The scenario is revolved around Nanib, Pravar, and their forces escaping from Delhi with Bahadur Shah and heading out towards Shimla to find and kill Colonel Edwardson.
Objectives[]
Primary objectives[]
- Destroy the Company Command Post. (10,000 XP)
Secondary objectives[]
- Destroy the Company Docks in the northeast. (1,000 XP)
- Clear the Company's vital Trade Route. (1,000 XP)
- Locate native resistance fighters and gain their support. (1,000 XP)
- Destroy the Trading Posts on the saltpeter sites. (3,000 XP)
- Prepare your defenses and destroy Edwardson's incoming army. (5,000 XP)
- Capture the Fort's Fixed Guns. (1,000 XP)
- Destroy the Company's Mills in the western town. (1,000 XP)
Players[]
Player[]
- Indian Mutineers (Indians):The payer starts out in southern part of the map with Nanib, Pravar, 5 Sepoy, and 2 Mahout Lancers. They are also provided with a colony containing a Town Center, Barracks, Houses, and a generous amount of Villagers evenly gathering food, wood, and coin. Water Buffaloes will be found near by the colony and building Sacred Field to task them will be helpful. A nearby Bhakti settlement will be present.
Enemy[]
- British India Company (British):The first wave of attacks will feature Imperial Hussars, and the player will need to have anti-cavalry units such as Sepoys and Zamburaks to counter them. After the first wave, there will be two stronger waves. These will consist of Musketeers, Rockets, Hussars, and Dragoons, and the player should have a mixed army to counter them. A large army of Musketeers and Rockets will charge first. Shortly after, another large wave of Hussar and Dragoons will come in from the left side, becoming a threat to the player's Sowars and siege units. Finally, a small band of Musketeers will attack the colony from the left side, but will be taken out easily.
The map[]
The map bears similar features to Deccan with a wild Elephants and Nilgai to hunt and Ashoka and Eucalyptus trees to chop down for wood. There is an ocean or a lake present near the right side of the map with fish present as well but there will be large navy of the Company's ships, comprised mostly by Caravels and some Frigates, and they must be destroyed in order to access the ocean.
Strategy[]
Players start out in southern part of the map with Nanib, Pravar, 5 Sepoy, and 2 Mahout Lancers. They are also provided with a colony containing a Town Center, Barracks, Houses, and a generous amount of Villagers evenly gathering food, wood, and coin. Water Buffaloes will be found near by the colony and building Sacred Field to task them will be helpful. A nearby Bhakti settlement will be present.
As the player is building their colony and amassing an army, they should be on the look out for a wave attacks by the company. Choosing Ottomans as an ally from the Consulate will be helpful due to their Great Bombards. A countdown clock will be on the top of the screen warning the player when the next wave of attacks will occur. The first wave of attacks will feature Imperial Hussar and the player will need to have anti cavalry units such as Sepoys and Zamburaks to counter them.
After the first wave of attacks is stopped, there will be two more and much stronger wave of attacks. These wave will consist of Musketeers, Rockets, Hussars, and Dragoons and the player should have mixed army to counter the Company troops. A large army of Musketeers and Rockets will first charge and will slay many of the players troops. Shortly after, another large wave of Hussar and Dragoons will come in from the left side becoming a threat to the player's Sowars and Siege Units. Finally, a small band of Musketeers will attack the colony from the left side but will be taken out easily. The player will lose many units of their army from fighting the second wave.
After the third wave is defeated, the player can march their forces forward to the river near the center of the map to destroy the Saltpeter sites. The wall surrounding the Command Post will also be revealed. The Saltpeter sites will help generate crates of food, cords of wood, and chests of coin. The Saltpeter sites will also help gain ground and keep the army in the company's settlements.
To help better prepare against enemy defenses, building Castles along the central river of the map will be useful in fending off minuscule enemy raids and preventing mass movement of the player's forces from one area to the other.
Once the player has ground on the Saltpeter sites, they start marching in and destroying the British colony. There will be weak resistance at this point with only a handful of Elmetti, Musketeers, and Rockets desperately defending the colony. The player can continue to destroy the colony's Town Center and building until only rubble is left.
The player will be very close to victory at this point and the only objectives left will be to kill Colonel Edwardson and destroy the Command Post nestled inside the durable walls. There will be a last and final brigade defending behind the fortress walls and desperately trying to defeat the player's forces. After the walls are destroyed, the player can easily charge in and kill the last remaining Company troops. The Colonel will also be found inside the walls by himself and will try to kill as much as he can before he too ultimately is killed. Once the colonel is killed, the player can use the Fixed Guns inside the fortress to destroy the Command Post and to ultimately complete the scenario and win the campaign.
After the campaign is won, the credits for The Asian Dynasties will be shown.
Trivia[]
- Although the map features a coast, Shimla is landlocked city in the Indian state of Himachal Pradesh and surrounded by the Himalaya foothills.
- After the Indian Rebellion of 1857, the East India Company was given to the power of Queen Victoria, making India directly ruled by Britain and ending up with the creation of the British Raj (1858-1947)


